A. Introduction
For current or prospective Mixpanel customers who prefer to avoid the often lengthy and complex process of manually instrumenting events, Convizit offers an appealing alternative. With no need for a tagging plan or manual event coding, Convizit’s AI-driven solution automatically collects user behavior data in websites and web applications. Convizit sends this event data – already named and property-enriched – into Mixpanel for reporting and analysis.
After adding Convizit’s JavaScript tag to a website/application, no further development resources or technical knowledge are required (e.g., there is no need to touch JavaScript or CSS selectors). A friendly visual interface makes it is easy for you to control which events are sent to Mixpanel, how they are named and which properties they contain.
On-demand historical data backfill allows additional behavioral analysis at any time, by sending additional historical data into Mixpanel, even if you initially decided not to receive those events and/or properties. And Convizit handles ongoing website changes automatically so that funnels and reports don’t break; no event tracking maintenance is required.
Convizit’s direct integration with Mixpanel allows you to quickly and easily realize the full potential of the platform within days of deployment, with little or no manual effort required. This document describes how this integration works.
B. Getting Started
This is the process to begin receiving event data from your website/application into Mixpanel via Convizit:
1. Add the Convizit tag to your website or application
Place the JavaScript snippet you received from Convizit at the beginning of the <head> … </head> section of every page of your website. Details about doing this can be found here: Deploying the Convizit Tag
As soon as the Convizit tag is operational in your website/application, Convizit will begin collecting, naming and structuring the user behavior data.
2. Provide Convizit with some information
Provide your Mixpanel project token and API secret to your Convizit account manager (to find these details, see the Project Settings page in Mixpanel’s Help Center).
3. Customize the data that Convizit collects (OPTIONAL)
- To associate your own known customer IDs with Convizit’s event data (highly recommended), see: Customer Identification and Enrichment
- To prevent Convizit from capturing clicks on specific website elements, see: Ensuring Data Privacy
- To add your own events and/or event properties to Convizit’s event data (using JavaScript), see: Coded Events and Coded Properties
4. Convizit will deliver your user behavior data into Mixpanel
- Convizit will typically begin sending data into Mixpanel within about one week from the time the Convizit tag is added to your website. Low-traffic sites might take longer (Convizit’s AI needs a certain amount of actual user traffic in order to accurately model a website or application).
- Convizit sends data into Mixpanel every 30 minutes.
- If, at any time, you wish to pause data delivery into Mixpanel, inform your Convizit contact person.
5. Validate that you are receiving data from Convizit
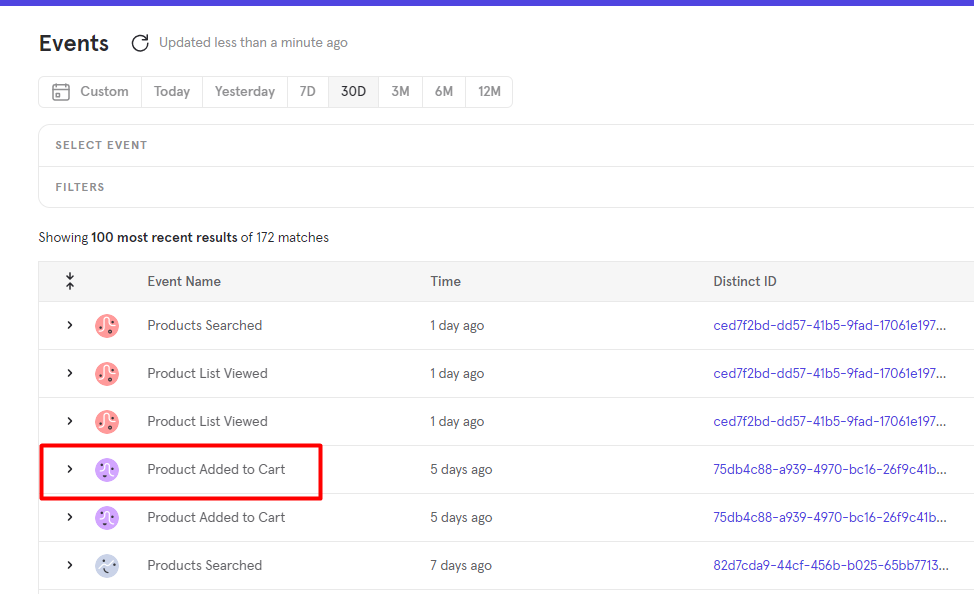
You can see the events arriving from Convizit in Mixpanel in the Events page. Note that it can take a few additional minutes for the data to appear on this page after it was received from Convizit.
If you also have other sources of event data in Mixpanel, follow these steps to confirm that events from Convizit’s are arriving in Mixpanel:
- Navigate to the Events page.
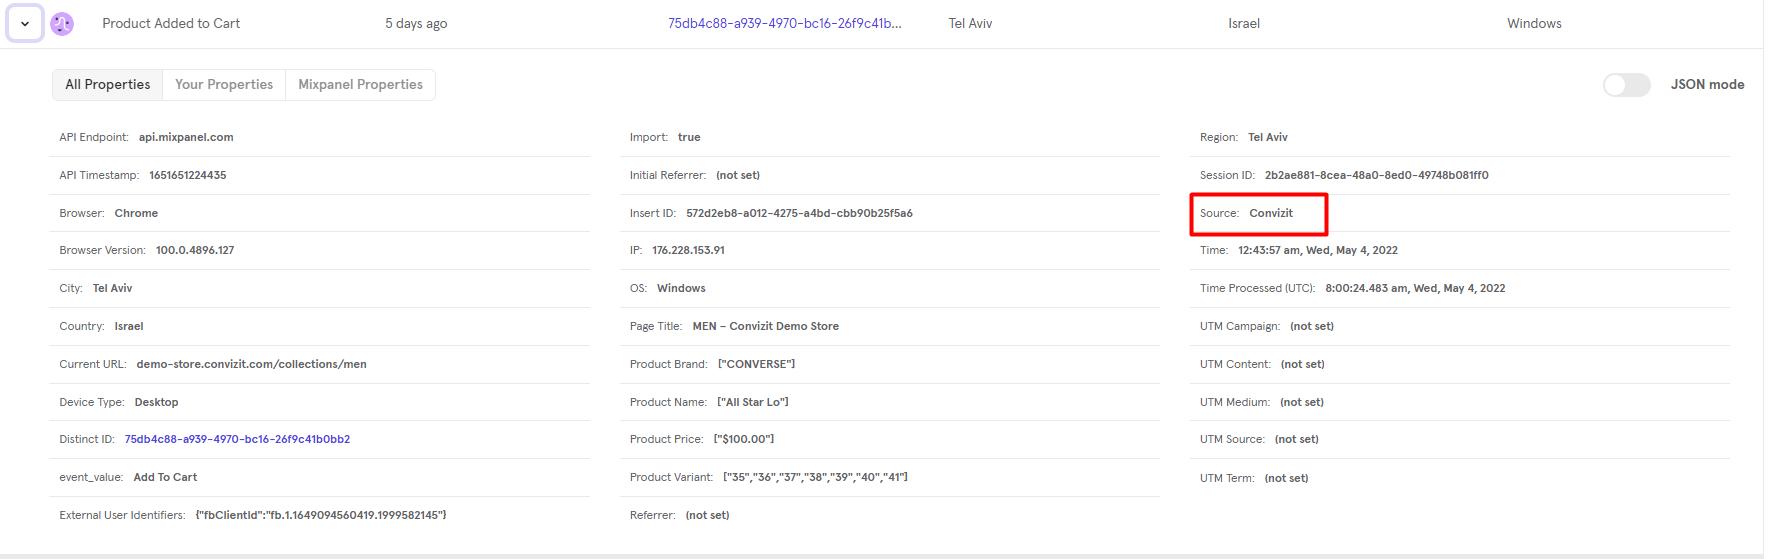
- Open an event by clicking on it.
- Looking in the event properties, you will know that the event was delivered to Mixpanel from Convizit when you see Source: Convizit.
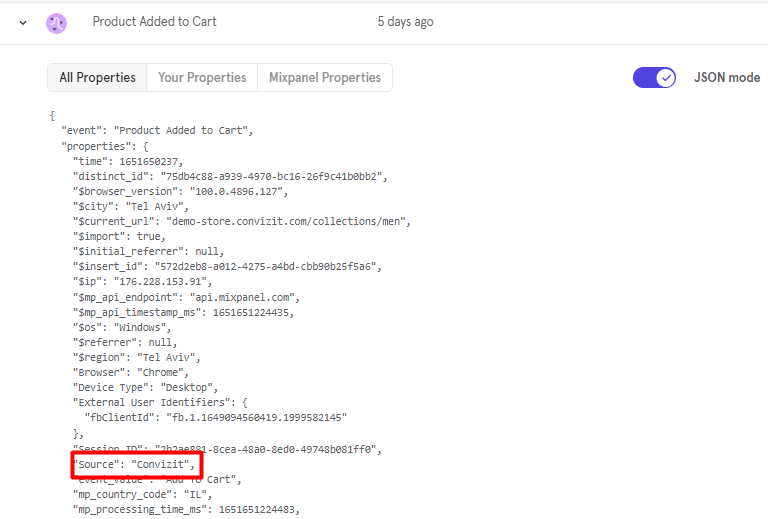
- You may also look for “source”: “Convizit” in JSON mode:
C. Customizing the Data Delivered by Convizit into Mixpanel
Using Convizit’s visual interface, you can easily understand the data that Convizit is capturing, and adjust how events and properties are delivered into Mixpanel:
- Review all the events and properties that Convizit is capturing.
- Select which events to receive in Mixpanel.
- Change the names of events and event properties.
- Exclude specific event properties from some/all events.
D. The Mixpanel Fields Populated by Convizit
For more technical users familiar with Mixpanel, here are the specific fields that Convizit populates in Mixpanel for each delivered event.
$insert_id | Convizit’s unique ID for the event |
event | Name of the event (e.g., “Add to cart”, “Size chart click”) |
time | Timestamp of the event in UTC as reported by the visitor’s device |
distinct_id | Convizit’s unique ID of the visitor |
$browser | Browser name (e.g., Chrome, Safari) |
$browser_version | Browser version number. |
$user_id | Identified customer ID passed by the website to Convizit |
$current_url | Complete URL of the webpage on which the event occurred |
$initial_referrer | Referring URL at session start, or the value $direct when no referrer |
$os | OS of the event sender (e.g., Android, iOS, Windows, Mac OS) |
$referrer | Referring URL to the current page, if available |
$ip | Visitor’s IP address |
utm_source | UTM Source parameter provided for the session, if available |
utm_medium | UTM Medium parameter provided for the session, if available |
utm_campaign | UTM Campaign parameter provided for the session, if available |
utm_term | UTM Term parameter provided for the session, if available |
utm_content | UTM Content parameter provided for the session, if available |
deviceType | Visitor’s device type (e.g., desktop, tablet, mobile) |
Additional data included as properties with each event: | |
Page Title | HTML title of the webpage on which the event occurred |
Session ID | Convizit’s unique ID for the session |
External User Identifiers | An array of one or more third-party visitor identifiers, if available (e.g., Facebook client ID, Google Analytics client ID) |
Source | “Convizit” |